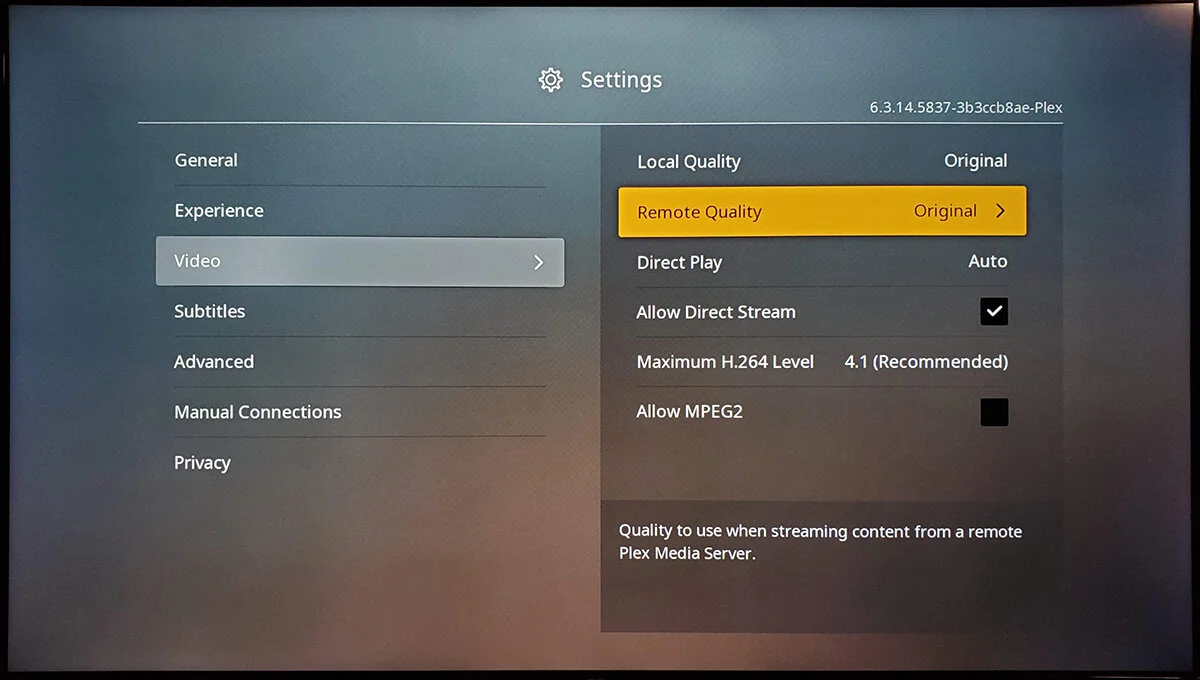
Hello and welcome to the Plex TV Remote Streaming Quality Guide! If you’re not a tech nerd but want to make sure your Plex experience is top-notch, you’re in the right place. Here’s a simple step-by-step guide to help you adjust streaming settings on your Plex app for smooth remote watching on your TV.
Step 1: Turn On Your TV and Open Plex
Start by turning on your TV and finding the Plex app. It’s usually an icon with colorful squares.
Step 2: Find Settings
Look for a little gear or a settings icon on the screen and click it to open the settings.
Step 3: Go to “Quality”
In the settings, look for the section called “Quality” or something along those lines.
Step 4: Choose Your Video Quality
You’ll now see options like “Auto,” “Maximum,” or specific numbers like “720p” or “1080p.” For the best experience, “Maximum” is the choice you want. Depending on your internet, you may have to change it back to “Auto”.
Step 5: Save Your Choice
Once you’ve picked your video quality, make sure to save your changes. Look for a button that says “Save” or “OK.”
Step 6: Check Your Choice
Test if everything’s working by trying to watch something. If it plays without any issues, congratulations, you did it!
Step 7: Change it Anytime
You’re not stuck with one choice forever. If you want to try a different quality or your internet changes, just go back to settings and make a new choice.
And there you have it! You’ve now set up your Plex to make sure you’re watching your favorite shows and movies without any problems. If anything comes up, remember, Plex has friendly support you can reach out to. Enjoy your streaming!


